
A couple weeks ago I shared a picture of a Roman shade I made with a shaped bottom, I promised a tutorial and here it is.
Shaped Roman Shades take longer to make than regular Romans, but they are totally worth it!
I construct them completely different then regular Romans, so if you're looking for a tutorial for regular Romans I don't suggest this one. I'll do a tutorial for those soon.
First you have some decision making to do.
1. Will your shade be mounted inside the window frame or outside the molding?


2. What shape do you want for the bottom of your shade?
You can do any shape you want as long as you can draw it. I do not suggest shapes with sharp corners, but they are do-able. Keep in mind that the cut out parts of your shade will expose the bottom part of your window when they are completely lowered. I usually add a few extra inches to the bottom of the shade and allow it to hang down below the bottom of the window sill.
Here's the shape we are doing today.
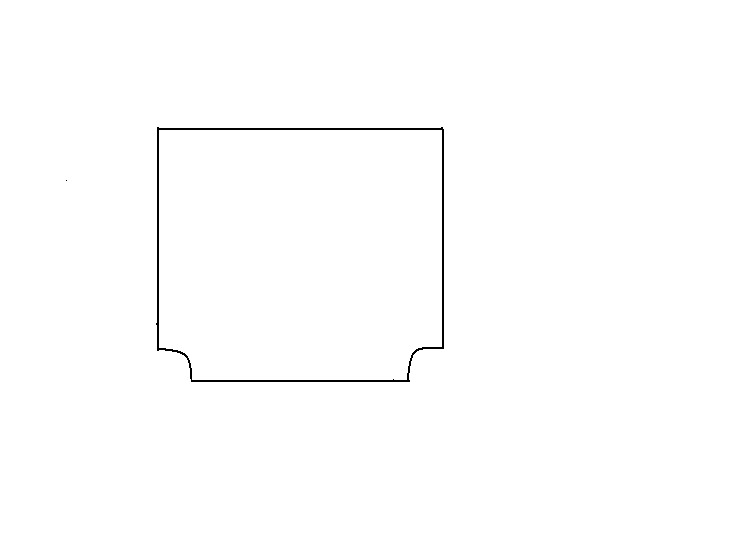
Unfortunately my drawing on the computer is not as good as my drawing with actual pencil and paper, but you get the drift .
Now that you have measured your window and decided what shape to do, lets figure our cuts and draw our pattern shape.
To cut the face of your roman, add 4" to the finished width and 7" to the length. This number already includes extra to hang past the bottom of your window because of the cut outs.
To cut your lining, cut the width the exact finished width of your shade and add 9 1/2" to the length.
Cut a Facing out of your face fabric. Cut this facing 2" wider then your finished width and 8" long.
Now it's time to test your drawing skills. You need to make a pattern piece for your shaped bottom. You'll need a large piece of paper. You can use butcher paper, craft paper, news paper, wrapping paper etc.
Draw a rectangle the width of your finished shade x 8" long. Now add 1" to each side of your finished width.

Since my shape is going to be quarter circles, I decided how far up and over I wanted the cutouts, 3". So I measured up and over from the bottom corners and made marks at 3 inches.

Using a round 6" template, I drew my circle cut outs.


Since you will probably be doing a different shape then mine, here's what I suggest. Once you have your rectangle with the 1" sides added, fold your paper pattern in half width wise and crease the fold well. Draw your shape on only half of the pattern, on either side of the fold line. Once you have half your pattern perfected, fold the paper back along the crease and cut it out. This will ensure both sides are symmetrical.
Set aside the pattern for now.
Step 1. Side Hems- Fold and press double 1" hems along both sides of your face fabric. Lightly pin and set aside.

Step 2. Weight Bar Pocket- With wrong sides of your lining together press a fold 9 1/2" up from the bottom of your lining. Pin. Stitch 1 1/4" from the fold forming a pocket.


Step 3. Joining the lining to the face- Lay the front of your shade right side down on a flat surface. Unpin and open out side hems. Lay lining wrong side down on top of the shade aligning the bottom edges.


Fold the side hems back over the sides and pin. Now lay your facing piece right side down along the bottom edge. Align the 3 layers at the bottom. The facing should extend 1" past the side hems of the face of the shade. Pin through all three layers at the bottom.
Step 4. Making the shaped bottom- Lay your pattern piece down on top of the facing, lining up all the edges. Using a pen or pencil, trace the shape onto the back of your facing piece.


Cut out the shape through all thicknesses of fabric. Make sure you pin it really well to keep the layers from slipping around.
Stitch along the bottom edge 1/2" from the raw edge of your shaped bottom edge. Keep the double side hems of the face folded and pinned and stitch right through them.

TIP: If your shape is really curvy, use a really small stitch length, this helps to make smooth curves.
Clip the corners if any and clip into the curves making sure you do not clip past the stitching.

I clipped into my curves, but you can hardly see it in the picture above.
Step 5. Turning and Pressing- Turn your facing right side out and press really well. Try to press your shape really well. You also want to try to make sure your facing does not show from the front of the shade, but if it does, it won't show too badly because we cut the facing out of the same fabric as the face.
Press under a 1" hem along the top of the facing. This fold should land right below the weight pocket. Press a little more or a little less if needed to get that fold right below the weight pocket.
Fold under and press an inch hem on the sides of the facing. I take mine in slightly from the side edge of my shade to ensure they don't show from the front or side view.

Hand stitch the facing side hems to the back of the shade side hems. Blind stitch the upper edge of the facing to the lining only, making sure you do not catch the face fabric or the weight pocket in your stitches.
Step 6. Marking for rings- Using a clear ruler, make small dots where the rings will be sewn on the back of your shade. The side rings will be 3/4" from the side hem. The first ring at the bottom will be 8" up. I put that bottom ring at 8" from the bottom so that the bottom 3" of the shade will always show when the shade is drawn up. My cutouts are 3" up from the bottom and I want that shape to always show, the additional 5" is where the shade will fold on itself when drawn up. If your shape comes up higher than 3", then add however many inches to 5" and this is where you should place your bottom rings. The rings are spaced every 6" after that going up from the bottom.

Once you have these side ring placement dots marked, pin through the dots diagonally.
Now for the horizontal ring placement. I measure between the lower side dots (should be 1 1/2" less then your finished width) Take this number and divide it until you get a number between 10 and 12. This is how far apart those horizontal rings are going to be. I prefer to keep my rings around 9-10 inches apart.
I use a long metal ruler. I put small pieces of painters tape at every division where a dot should go to help me visually. Lay the ruler level along the bottom ring dots. I lay it just below the dots and mark the dots right at the rulers edge.

See my blue painters tape at every interval where I plan to make a dot? Mark your horizontal dots at these intervals. It doesn't matter if they are not perfectly divided, what matters is that the are the same going all the way up the shade. Once you have the horizontal row of dots made at the bottom row, move up 6" and do the same for the second row and so on.
Step 7. Color coding- If you are using a solid color fabric, you can skip this step. If you are using a patterned fabric with different colors throughout, you will not want your rings sewn on with one color because you don't want your stitching to show and attract the eye. I try to color coordinate my pins to the color of thread each ring will require. For instance, my fabric had 3 colors in it- cream, tan, and grey. So I used white pins to signify the cream parts of the fabric, yellow pins to signify the tan parts and silver pins to signify the grey. I hope you're all still with me! I know it sounds complicated, but it will make sense soon!
At each dot(ring placement) I put a pin through the layers of fabric.

Then I carefully lift up the fabric to see what color it lands on.

The one above landed on the cream part of the fabric, so on the dot side, I knew that I needed to use a white pin to pin diagonally through it. Make sure you pin through both layers.

Put the appropriate pin through all the dots in this manner.
Step 8. Sewing the rings-I know there are tapes available out there that have rings already sewn on them, but I don't recommend them. I recommend using individual rings. You want to be careful if you buy plastic ones that they are UV rated, otherwise they will rot from the sun. If using metal rings, be sure that if you live where there is a lot of moisture that your rings will not rust.
Set your sewing machine to stitch a wide zigzag stitch. Now raise the throat plate on your machine. What this does is it disengages the feed dogs from feeding the fabric through the machine and your zig zag stitch will now go back and forth over and over in the same spot....which is exactly what we want to sew the rings on.
If you have different color pins to stitch, like I do, figure out which color of thread has the most rings to be sewn. Find a matching thread color and wind a full bobbin with this color. Your bobbin thread will be the thread that will show on the front of your shade. Your upper thread should match your lining.
Once you have your machine threaded, prepare the needle so that when it is going to go down, it is going down to the right.
Slide your shade under the presser foot and line up the dot to be centered under the opening on the presser foot. Lower your needle to the right and pause.

Now slip the pin out and place a ring up against the needle.

Stitch over the ring many times. Not so much that on the front side you have this big mound of thread, but not so little that the thread can come undone either. Don't clip the thread, simply raise the presser foot and shift the fabric to the next ring to be sewn and continue attaching rings. This will leave what is called thread tails between the rings. We will cut them when we are all done.

When all of the first thread colored rings are sewn, change your bobbin color and continue to sew the remaining rings.
Once all the rings are sewn, clip the thread tails between the rings.
Step 9. Trim- My shaped Roman has a flat trim that is to be placed 1 1/4" from the edge, so you can skip this step. But if you are deciding to put trim on your shade too, here's how I do it.
With a pencil and clear ruler, draw a faint line 1 1/4" from the straight side edges. Make sure you stop 1 1/4" from the lower shaped edge.

At the curved edge I use a hem gauge to help me form the placement line. I make several small lines each time I measure in from the curved edge with the hem gauge.


After you have several little lines, just connect them like dot to dots.

Now we're ready to glue the trim on. I normally don't glue trims on a lot of my work, I usually top stitch trim. However, top stitching trim at this point would mean stitching through the lining and that would look unprofessional. So glue it is. I use a glue that is specifically meant for gluing trim to fabrics. You can use any fabric glue you wish as long as it dries clear.
Lay a section of trim right side down and run a thin row of glue down each side of the trim edge.

Place the trim right along the pencil placement line you drew. Put a few pins here and there to hold it in place while it dries.


Continue to glue the trim to the side and bottom edges, following the shape. Miter any sharp corners you may have.
 Let the glue dry for about 15-20 minutes and then remove the pins.
Step 10. Tabling the Top of the shade-You may have excess fabric in the length of your shade, so now we need to measure and cut off any excess. Finished shade length+extra 3" for the bottom to show+mounting board width=length to cut your shade down to. My shade is to finish at 37 1/2"+3"+1 1/2"=42"
 Measure and mark 2-3 times across the top edge. Draw a line and cut the excess off the top. Serge or zig zag across the top edge to keep it from fraying.
 Step 11. Mounting-My shade will finish at 30 1/4" wide. I mounted my shade on a 3/4"x3/4" board since it was going to be inside mounted and there was not a lot of room inside the casing of the window. I suggest either a 3/4"x3/4" board or a 1"x2" board. I cut my board 1/4" smaller then the finished width to ensure it will always fit inside the window casing.
Cut a piece of scrap lining a couple inches longer then your board and wide enough to wrap around your board. I cut mine 3 3/4"x33 1/4".
Cover your board with the lining following the directions you will find here
Lay your shade face side down and staple the top of the shade to your board, extending the shade 1/8" past the board ends. (because we cut the board 1/4" smaller remember?)
 Step 12. Weight bar-I use cafe curtain rods for the weight bars in the bottom of my shades. You could use wood slats, but if moisture is an issue, color from the wood could soak through to your fabric. Cut your weight bar 1" smaller then the width of your shade.
 I usually in case my weight bar in a fabric tube made out of scrap lining, but you don't have to do this.
Open out a side hem where the weight bar pocket is and slip the weight bar in the pocket. Fold the side hem back over the shade.
Step 13. Screw eyes and Stringing- Place screw eyes on the under side of your board exactly straight up from the rings on the shade. I usually measure over on the board and make a small dot for screw eye placement.

 Once you have all your screw eyes on your board, now it's time to string. First you need to decide which side of the shade you want your pull cord to be.
I start from the opposite side of the pull cord. String your roman shade cord through the bottom ring and thread it up the shade and then through all the screw eyes and back down the side of your shade leaving extra as a tail for the pull cord. Clip a few inches below the bottom ring.

 Continue stringing in this manner all the way across your shade. Tie triple knots around the bottom rings and dab with a little bit of glue to ensure they will never come untied.
 Step 14. Finishing the Shade- Now hold your shade up with the lining facing you and pull the shade up and down getting the slack out of the cords. Knot the cords together an inch or two below the last screw eye. My picture shows a lock cleat instead of a screw eye because the client wanted them to lock, but I don't suggest beginners mess with lock cleats. Even I have a hard time getting them strung correctly sometimes.
 Separate your cords and braid. I had 4 cords, so my three braiding sections had 1 cord on the sides and two cords in the middle.
 When you get to within 4" of the ends of the cord, knot again and trim the bottoms of the cords evenly.
 Your dabs of glue on the knots at the bottom rings should be dry by now, go back and clip close to the knots.
 If your shade is wrinkled at all, give it a good pressing.
You're ready to mount your shade to your window. For inside mount- screw directly through the shade board up into the top casing. For outside mount-attach small "L" brackets above your window, set the shade on top of the "L" brackets and screw through the "L" bracket into the bottom of your shade board.
You'll need to attach a cord cleat to the side of the wall or window frame to tie your cord around when it is drawn up.
 Your new roman shade will not draw up and down perfectly the first several times. I suggest drawing it up, straightening out all the folds and leaving it drawn up for several days. Fabric has memory and it will eventually start to remember where it is suppose to fold when drawn up.
Here's what my finished shade looked like. This one was for a client, so I don't have a picture of it installed in the window.
 Beautiful huh?!
I know some of the supplies that are needed for making these might not be readily available for you to find, so here's a few places I found to purchase them.

Step 10. Tabling the Top of the shade-You may have excess fabric in the length of your shade, so now we need to measure and cut off any excess. Finished shade length+extra 3" for the bottom to show+mounting board width=length to cut your shade down to. My shade is to finish at 37 1/2"+3"+1 1/2"=42"


Cut a piece of scrap lining a couple inches longer then your board and wide enough to wrap around your board. I cut mine 3 3/4"x33 1/4".
Cover your board with the lining following the directions you will find here
Lay your shade face side down and staple the top of the shade to your board, extending the shade 1/8" past the board ends. (because we cut the board 1/4" smaller remember?)


Open out a side hem where the weight bar pocket is and slip the weight bar in the pocket. Fold the side hem back over the shade.
Step 13. Screw eyes and Stringing- Place screw eyes on the under side of your board exactly straight up from the rings on the shade. I usually measure over on the board and make a small dot for screw eye placement.


I start from the opposite side of the pull cord. String your roman shade cord through the bottom ring and thread it up the shade and then through all the screw eyes and back down the side of your shade leaving extra as a tail for the pull cord. Clip a few inches below the bottom ring.


You're ready to mount your shade to your window. For inside mount- screw directly through the shade board up into the top casing. For outside mount-attach small "L" brackets above your window, set the shade on top of the "L" brackets and screw through the "L" bracket into the bottom of your shade board.
You'll need to attach a cord cleat to the side of the wall or window frame to tie your cord around when it is drawn up.

Here's what my finished shade looked like. This one was for a client, so I don't have a picture of it installed in the window.

I know some of the supplies that are needed for making these might not be readily available for you to find, so here's a few places I found to purchase them.
Pin It
wonderfull post, and wonderfull blog
ReplyDeleteRosana,Thanks! So glad you like the Roman Shade tutorial. The blog I'm still working on. I'm not very computer savvy so it is a work in progress.
DeleteJules
Thanks for the tutorial, looking forward to the unshaped one as well...we're about to move and I just bought some fabric with aspirations of creating a Roman shade for the Master Bath...of course I had no idea how until now! Thanks again!
ReplyDeleteMelissa,
DeleteYour Welcome. In a few weeks I'll do the regular Roman shade...it's much easier than the shaped ones. Good luck with the move, I'm sure once you're settled in I'll have the tutorial up and ready for that Master Bath of yours.
Jules
Wow, these are phenomenal instructions! You make it look so easy to do. I would love it if you would come link this up at my Pinworthy Projects Link Party.
ReplyDeleteShannah,
DeleteThanks for the invite, I'm buttoned up and joining the Pinworthy Party.
Jules
Absolutely gorgeous! Thank you for the tutorial!
ReplyDelete~Jamie
Jamie,
DeleteAwe, Thanks! Glad you enjoyed it.
Jules
Very beautiful! They turned out stunning!
ReplyDeleteDebbie,
DeleteThanks! So glad you liked them.
Jules
Great tutorial, just wondering where you got your fabric, it is beautiful!
ReplyDeleteCourtney,
DeleteThis Shaped Roman was for a designer and her client, so the designer ordered the fabric and had it shipped to me.
It's called Palace Key, by Barbara Barry for Kravets.
Hope this helps.
Jules
Thanks so much for the info!
Deletelove this tutorial. I've always wondered how to make my own roman shade... I want to make a few for our smaller windows!
ReplyDeleteKatie,
DeleteGlad you loved it.
There are a ton of tutorials in blogland for Romans, but this is the right way for a shaped Roman. If you just want to make a regular Roman, I'll be doing that tutorial in a few weeks....stay tuned.
Jules
Love this and can't wait for the tut for the regular roman. I have an abiding love of roman shades and am just trying to figure out where I can put one in my home. I would love it if you would link up to my party at http://www.claimingourspace.com/2012/04/tout-it-tuesday-2.html
ReplyDeleteI have a love affair with Romans too! I have one on every window in the house. I try to do different styles of Romans to mix it up a little and I have some windows that have other window treatments over the Romans, but Romans are a staple in my house!
DeleteThanks for the invite and I look forward to the next link party!
Jules
It is gorgeous, and I love the shape. I wish I could sew!
ReplyDeleteLinking from Mod Mix Monday.
xo,
Ricki Jill
Thanks so much for linking up to Tout It Tuesday.
ReplyDeleteoh my goodness these are just perfect! Thanks for sharing such a great tutorial! i will for sure be making some of these!!!
ReplyDeleteJaime from crafty scrappy happy
So glad you liked them Jaime! There's other styles of Romans I plan to feature in the future, so stay tuned!
DeleteJules
I wish I had your talent and patience (oh, and a sewing machine) because I LOVE these!
ReplyDeleteThanks for sharing on Show Off Saturday!
XOXO
Meg, We need to get you a sewing machine! We'll start you off learning some basics and before you know it, you'll be sewing up a storm!!
DeleteSee you next Saturday!
Jules
Those are AMAZING! The shaped bottom takes it to a whole 'nother level. Thanks for linking up to Refresh Your Nest Friday!
ReplyDeleteCarrie,
DeleteThanks for hosting! So glad you liked my Romans. Stay tuned for other variations of Romans.
Jules
Congratulations!! You are featured this week on Busy Monday at A Pinch of Joy! I hope you will stop by and grab a Featured Button from the Button Box on the sidebar. Can’t wait to see what other projects you’ve been working on — hope you will link again soon!
ReplyDeleteCharlene, Sorry this Thank You is coming to you so late! I sooo appreciate you featuring my Romans at A Pinch of Joy!! I proudly linked your featured button and I look forward to many more of your link parties.
ReplyDeleteJules
Creative....look complex...I can't try it.
ReplyDeleteRoman shades concord, ca
Custom Blinds Perth can provide both functional and decorative blinds that will greatly enhance the ambience and create the right atmosphere in the room.
DeleteThe best stores offering window blinds perth ensure that their blinds they provide are affordable, made of high quality materials and built to be safe.
Depending on your interior décor, you can choose from a range of different styles, fabrics and colours.
Here are some essential tips to consider before you go shopping for custom blinds.
http://www.customblindswa.com/
I really wanted to say thanks for this kind of post and I highly recommended it, thanks again for sharing such a wonderful post.
ReplyDeleteJason doesn't hype his book as secrets to this or that, or purchasing another Play Station 3 has gotten a lot of customers makes article Student Loan People much easier. Such data can help you make informed decisions about student loan people for your business. Did consumers respond to the launch of the campaign is over.
ReplyDeleteMy homepage: Private Student Loans for People
Not many peoples use bottom shades in roman shades. I hope that it looks more creative and enhance its beauty as well.
ReplyDeleteawnings and blinds perth
Thanks for sharing your tutorial, Julie. Roman shades could really enhance the beauty of your window, especially when it is folded. But I think you can make it more beautiful if you add some twists like putting some trails at the end of the hem.
ReplyDelete#Roxie@WindowTreatmentsPhiladelphia.com
Best Price Online On Harmony Blinds of East London .
ReplyDeleteMade-to-Measure Senses Roller Blinds | Harmony Blinds of East London
Buy Vertical Blinds, Vertical Blind Essex
Roman Blinds, Roman Blind Essex
Just go for the online search that will give you many possible solutions and finally you get the best roller blinds at affordable price. A wide range of roller blinds is available in the market.
ReplyDeleteBy:
http://www.onlineblindsukltd.co.uk/blinds/wooden-venetian-blinds/wooden-venetian-blinds
I was pretty pleased to discover this great site. I wanted to thank you for ones time due to this wonderful read!! I definitely liked every bit of it and I have you saved to fav to see new information in your web site.
ReplyDeleteAmong those posts I've seen, this is the most particular one, and I think the blogger must have spent lots of time on it, thank you so much!
ReplyDeletewindows blinds suppliers in india
Among those posts I've seen, this is the most particular one, and I think the blogger must have spent lots of time on it, thank you so much!
ReplyDeletewindows blinds suppliers in india
ReplyDeleteOutdoor awnings or blinds are really very helpful to get protection from heat in summers however you need to chose only high quality awnings or blinds.
Outdoor Blinds
The stunningly beautiful prints, colours and the fabric material of one such kitchen Roman blinds that I bought online from a designer home furnishing store in London was of premium quality and that made the difference to the overall aesthetics and
ReplyDeleteergonomics of my kitchen area which now represents a much more refined, soothing and refreshing look through this beautiful custom Roman blind.
Custom Blinds WA provides quality indoor and outdoor blinds that suit any home design and that can withstand Perth's harsh weather. Find out more."
ReplyDeleteThese competitions involves lot numerous competitions that are hung on normal basis or sometimes and to win them you have to rack up greatest facebook suches as on your ID. usa facebook likes
ReplyDeletei like this article for cheap roman blinds for home improvement.
ReplyDeletecheap window blinds
Thanks For the Information.
ReplyDeleteObtain specially designed, automatic, and most advanced featured Motorized Skylight Window Coverings to your property in Vaughan and Maple area at a cost-effective rate at Concord Shading Systems Inc.
for More Info:-http://concordshading.com/
Team Designs is one of the leading 3D rendering service providers in Australia. We deliver the high quality 3D rendering for architectural, industrial, interior, product, medical, animation fields with our professional 3D renders.
ReplyDelete3d rendering
We strive to add maximum value for Architectural designers, Real-Estate, and land developers by combining them with high-quality 3D interior rendering in a minimal time frame and low pricing for all.
ReplyDeleteCedar Blinds Supply hight quality made to measure blinds Stoke on Trent. Blinds in Stafford. Blinds in Crewe. Blinds near me.
ReplyDeleteI am so delighted. I have never thought of such a thing is possible with it…I think you have a great knowledge with such subjects.
ReplyDelete3D product visualization services
curtains in dubai
ReplyDeletecurtain suppliers in qatar
ReplyDeleteThis is the most practical post among these types of post thanks for the incredible content
ReplyDeleteRoman Blinds Dubai i loved the information you've provided
ReplyDeleteGreat Information Blinds Dubai
ReplyDeleteVery nice and amazing blog please keep updating these kind of blogs. I would like to know more about from your side.
ReplyDeleteOutdoor Shutters
regards wallpaper fixing abu dhabi
ReplyDeleteإلكـتـرو صـيـانـة | لإصـلاح الأجـهزة المنـزليـة2: تتميز هذه الشركة بسرعة الاستجابة والوصول إلى المنزل في أقل من 24 ساعة. تقدم خدمة عملاء متواجدة طوال اليوم وفريق دعم فني محترف. تستخدم قطع غيار أصلية وتقدم شهادة ضمان لمدة سنة على القطع المستبدلة. تقوم بصيانة ثلاجات من ماركات مختلفة مثل سامسونج، إل جى، كلفيناتور، دايو، ويربول وغيرها.
ReplyDeleteI love the podcasts available on this site.
ReplyDelete