Outdoor drapery panels are becoming increasingly popular! I think they bring a touch of the indoor whimsy to outdoor spaces. They also have a few practical uses too. They can lend a hand with the harsh sun and add a touch of privacy to outdoor seating areas.
Here's just a few images I found on the Internet.
Although in these images a cool summer breeze against the panels looks appealing, the wind can actually blow outdoor panels all over the place causing more havoc than whimsy.
I've been making outdoor panels for clients for years and here's a full tutorial on making outdoor panels with a bonus tip on how to keep them from blowing around when a cool summer breeze comes along.
I'm making 2 panels that will be 2 widths of fabric each. You always want to make sure you have plenty of fullness when making outdoor panels.
My panels will finish at 94" long.
So lets figure our cuts. 94" plus 4" (double 2" bottom hem) plus 4" (double 2" top hem) plus 2" to straighten/table the fabric. Now I'm only making my top hem/header 2" wide because I'm using fairly small grommets. If you decide to use larger grommets than mine, adjust your top hem/header to be wider. You want your grommets to be centered in the top hem.
Cutting- For 2 panels that will be 2 widths of fabric each I cut 4 @ 104" long.
Seam- I made my seams with my over lock/serger. But you can make french seams if you don't have an over lock machine. You just want to make sure your seams look nice on both sides of the panel.
Since I have a special tip for keeping these from blowing around, I construct them in a little different order than I usually do with drapery panels. We will be doing our top hem aka header first.
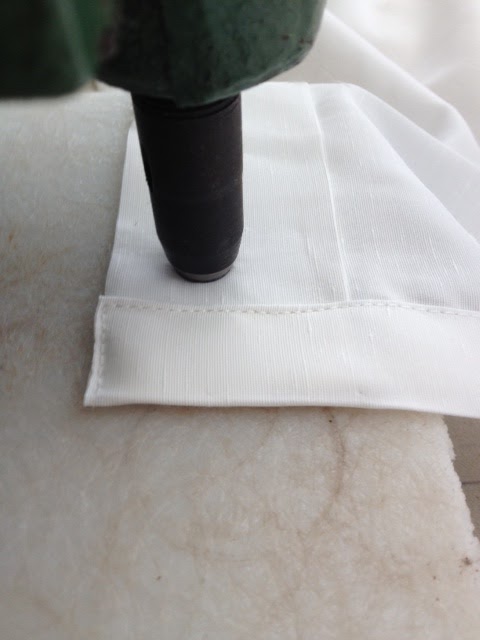
Top Hem/Header- Press a double 2" top hem. First press down 4", then straighten out and press the top edge to the 4" crease and press over. Pin every 8-10 inches. There is no need to stitch this top edge! The grommets will hold the top hem in place. Next we will do our side hems.
Side Hems- Press over a double 1 1/2 " side hem on both sides of the panel. Start by pressing up a 3" hem, then open out and press the side to the 3" crease mark.
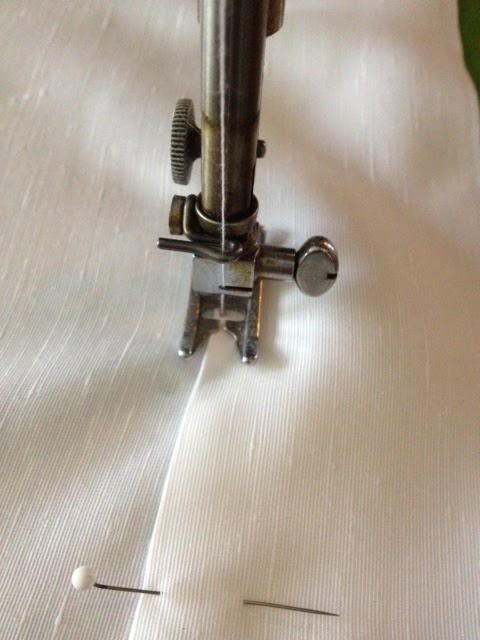
Pin your side hems in place. I pinned mine this way because I intended to sew them with my blind hemmer, but the fabric was not feeding through my blind hemmer correctly so I ended up top stitching my hems instead. Stitch your side hems.
Now we need to "table" our panels and press up the bottom hem. Tabling is when you measure and cut the excess fabric off that you added in your original measures. I'm sure you're wondering why we add excess to begin with if we're just going to cut if off. Well, Folding and pressing and stitching take up slightly more fabric than you would think. Plus the seams gather up the fabric ever so slightly and can cause your panels to be sorter where the seams are.
Tabling- I have a large workroom table that I do mine on, but you can do yours on a hard floor or any other surface you can find that will work. Anchor your top edge of your panels along a straight edge. you can tape it to the straight edge of a floor tile. Now measure down your finished length plus your bottom hem allowance. Mine in this case is 98". You can run a row of painters tape at your measured edge to help guide you where to cut.
Cut the excess off.
Bottom hem-Now press up a double 2" hem using the same method as you did for the side and top hems.
Stitch the bottom hem.
I'm putting size #4 grommets in the top of my panels. You can use whatever size you want.
There's a few things you need to know about grommets....You ALWAYS have to use an even number of grommets!!! I usually set my grommets approx 6" apart. That means center of the grommet to center of the next grommet. But if you want your fabric to droop between the grommets then you might want to space them 10" apart. The spacing isn't as important as the fact that you use an even number of grommets!
So first I decided how far in from the edge I wanted my first and last grommet.
I usually place my first grommet just after the side hem. So mark your first and last grommet placement. Now measure the distance between theses two grommets and divide by 6". Whatever this number turns out to be, round it up or down to be an odd number. Now take this odd number and divide it into the distance between your 2 side grommets....this will be your exact distance between each grommet (center to center) This number may turn out to be anywhere from 5"- 6 1/2". That's ok. It's approx. 6" that we are shooting for.
After you have all your grommet placements marked, count again and make sure you have an even number of grommets. I set grommets all the time and I have even screwed this up before, so now I always double check.
Here's the grommets I will be using.
There are 2 pieces to every grommet. The one with the shank is the front of the grommet, and the one that is flat like a washer (although this one has teeth) is the back of the grommet.
I take the front grommet piece and center it along my header and trace the inside circle with a pencil. This makes it easier for me to see exactly where I need to cut my holes for the grommets.
Being that I make these all the time in my business, I own a grommet setting machine. Since you probably don't have a grommet setter, there are other grommet setting tools on the market. When I first started my business, I just used the ones you hammer with a piece of scrap wood.
Setting Grommets-First you have to cut all the holes for the grommets, so I attached the cutting tool to my grommet machine. Under the cutter goes a plastic cutting mat to help prevent dulling of the cutter.
Cut all the holes.
Once all my holes were cut, I switched the attachments from the cutter to the setter pieces.
The front grommet piece goes down on the setter, then I slip my fabric over the shank and place a back grommet piece on top with the gripper teeth down.
My machine takes a little muscle to set the grommets tight, so I usually have my teenage son do this part for me. I love that he is at the age where I can use his muscle power!
Now here's the tip for keeping these panels from blowing around.......Chain. Just plain old chain that you get at your hardware store.
Measure the finished width of your panel and have a piece of chain cut for each panel. You want your chain to be approx. 2" shorter than the width of your panel. If you are using a dark heavy fabric for your outdoor panels, than there is no need to cover the chain. Simply feed it into your bottom hem and tack it at the side edges with a few hand stitches.
If you're using a white light weight fabric like I am, then you will need to make a casing tube for your chain so that it will not be seen through the sheer fabric.
I cut long lengths of white lining 2" wide. I fold it in half the length of the tube and stitch forming a long tube. I turn it right side out.
Feed the chain into this long tube.
Turn under the edge of one end of the tube and stitch it closed. Your stitching doesn't have to be perfect, no one will ever see this part. Now hand tack your chain to the tube a little ways back from the end of the tube. An inch or so is good.
Once you get all the chain fed into the tube, close off the other end of the tube the same way. Make sure you also hand tack through the chain and tube to keep the chain from slipping around inside the tube.
Feed the tube/chain combo into your bottom hem of your panels. Pull the end of the tube to the very edge of your panels side edges but not far enough where it hangs out the side hems.
Now top stitch across the sides of the bottom hem making sure to catch the tube ends at the same time.
No more outdoor panels flapping around on a windy day!
Pin It