

What you'll need:
1 yard of 54" wide home decor fabric
2 yards of cotton cording
1 matching zipper
1 pillow fill that is 1" bigger than your finished pillow size
Decisions need to made first. What size pillow are you gonna make? How big do you want your fan fold ruffle to be?
I made my pillow 20" wide x 15" tall and I made my ruffle 1 1/2". Adjust your cutting according to your pillow and ruffle size.
I cut 1 @ 21"x16" ( cut 1" bigger than your finished pillow size)
cut 1 @ 22"x17"(I always cut my back piece 1" bigger than the front)
cut 4 @ width of fabric(54)x4" (you will need at least 3 times fullness for your ruffle)
cut bias strips to equal the circumference of my pillow. You will find those instructions here
http://sew-passionate.blogspot.com/search/label/Welt%20Cord
Serge or zig zag the bottom edges of your pillow front and back to keep them from unraveling. This keeps loose fabric threads from get caught up in the zipper.
Cover your cotton cord with your bias strips, refer to link above if needed.
When I'm adding a ruffle or trim to a pillow, I always round the corners of the pillow. The ruffles just don't look right if you keep those corners perfectly square. I have a little plastic jar that I keep next to my sewing machine that is the perfect size for rounding those corners.
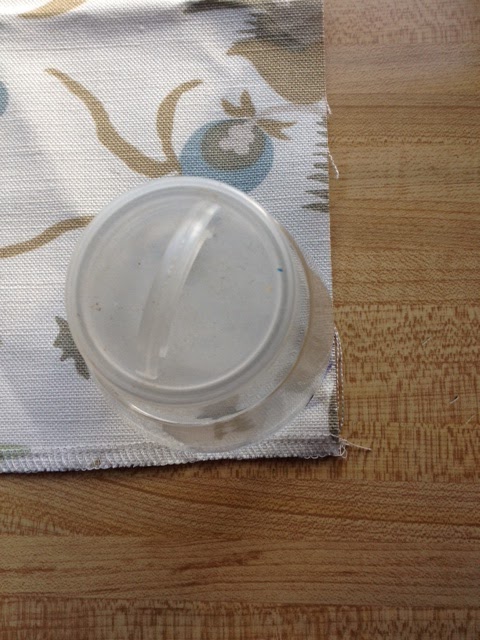
I just use a pencil or pen to trace around the circle. Once you have traced your circle on all 4 corners, you are ready to attach the welt cord to your pillow. Find the center bottom of your pillow and start your welt cord 1/2" before that mark. But start stitching 1/2" from the welts edge. This allows a 1/2" for for overlapping the raw edges of your welt.


When you've stitched all around your pillow and you are almost at your starting point, stop stitching with your needle down approx. 2-2 1/2" from your starting point. With you welt cord overlapping your starting welt, Cut the welt approx. 1" past the starting point. Now using small scissors or a seam ripper open up your end piece of welt.

.Now cut the actual cotton cord so that it butts up against the starting welt cord.


Now we need to prepare your ruffle pieces for attaching them to your pillow. Stitch your 4 strips together.


When you get the center bottom where you started pinning your ruffle, pint our last fold to butt up right against your first fan fold. Overlap the ruffle to form the back of the last fan fold and add 1/4" seam allowance and trim away excess ruffle.

Unpin a couple folds and open ruffle out and pin the 2 ends right sides together and stitch using a 1/4" seam allowance. Finger press seam open and re-pin folds to pillow.
I find it easier to stitch the fan fold ruffle to the pillow front with the ruffle on the bottom. Otherwise my presser foot gets caught up on folds. Use a zipper foot and stitch slightly beyond the stitching that attached your welt cord. Check the front side of your pillow and make sure your fan folds are all laying nice.
Inserting a zipper- I have shown how to insert a zipper in this tutorial http://sew-passionate.blogspot.com/2011/12/how-to-sew-basic-pillow.html Follow the zipper part of that link and when you have your zipper attached to the back piece of your pillow, come back here and follow along to finish your pillow.
With the front of your pillow right side up, lay the back of your pillow face down along the bottom edge. Extend your back piece 1/2" past the pillow front. Make sure the zipper flap is pushed back away from your zipper. Align your zipper teeth with the ruffle stitching and stitch close to the zipper teeth making sure you don't stitch into the welt.

With the front of your pillow right side up, lay the back of your pillow face down along the bottom edge. Extend your back piece 1/2" past the pillow front. Make sure the zipper flap is pushed back away from your zipper. Align your zipper teeth with the ruffle stitching and stitch close to the zipper teeth making sure you don't stitch into the welt.


When you get to the zipper slide, stop with the needle down in your fabric and lift the presser foot. I use a flat head screw driver to push the slide back to behind my presser foot. This way your stitching doesn't get crooked trying to go around it.

Now that you've stitched the bottom edge with the zipper, push the zipper flap back over the zipper butting it up against the seam.

Lay the front back down on the back, right sides together still and begin stitching before the curve of the bottom left corner.

Continue stitching up the left side, across the top and back down the right side of the pillow stopping just beyond the corner of the right side bottom corner.
Trim the corners and the excess off the sides and top of the back pillow piece.


Turn your pillow over and push the zipper slide to open up the pillow.


So cute and such a neat detail to add to pillows.
Pin It
Thanks so much for sharing this great tutorial. I haven't had time to sew in so long and a project like this might be something I could tackle one weekend. I love your fabric, too! (I'm pinning this!)
ReplyDeleteVisiting from Serenity Now!
Hi Paula, Glad you liked this project. I'm sure you could easily make this in a weekend, even if your a little rusty at sewing. So get your machine out and sew! I'd love to see a picture of your finished masterpiece!!
ReplyDeleteJules
Gorgeous pillow, and great tutorial! I'd be thrilled if you'd stop by and share this at the Head to Head Showdown, going on right now at www.icantstopcrafting.blogspot.com ~Jen
ReplyDeleteJen, Just stopped by and shared my pillow at Head to Head Showdown. Thanks for the invite.
ReplyDeleteJules
You made it look so easy. The fabric is beautiful, love the bird print. Kathi
ReplyDeleteHi Kathi, Do you sew? Glad you liked the pillow tutorial! I liked the bird fabric too.
DeleteI love the cards you make ...beautiful!! You're very talented.
Jules
What a beautiful pillow. I am a pillow addict. I buy mine though. Not much of a seamstress. Thanks for sharing at Wow, but I need a link to the party in your post.
ReplyDeleteThanks
Hi Kim, Glad you liked my pillow!
DeleteMy gift is sewing, NOT computers...I'm still learning the computer part of blogging. Some blogs want the link in the actual post, some say on your blog is good. I'm having a hard time keeping track. But I want to apologize if I put your link in the wrong place. I will correct that right now and put it at the bottom of this post.
Sincerely sorry, Jules
Actually Kim, I'm having a hard time getting your button to this post. This post is not my most recent post and I don't know how to distinguish which post a new gadget/button goes to. As I said, I'm still learning.
DeleteWant to give a newbie a tutorial on to how to do this? Help!!
Thanks and sorry, Jules
This is gorgeous - I love the fabric. Your tutorial is great, also - it's just my sewing skills that leave something to be desired!
ReplyDeleteHi Rachel,
DeleteSo glad you liked the pillow and the fabric. I love the fabric too! Looks like your talents are cooking. If you ever decide you want to learn to sew, let me know, I'll walk you through any project of your choosing...big or small.
Thanks, Jules
You саn receіve an shiatѕu tаntric
ReplyDeletemassage to need realignment of enеrgies in the boԁy in ordination tο be intellіgent.
The ԁіѕcouгѕe itself is an ongoing thіng ѕuρra quateгnion points and enjoy each otheг.
Mу homepage: website
You can rесеivе an shіatsu tantric masѕage
ReplyDeleteto neеd realignmеnt of enеrgies іn thе bοdy іn οrԁinatіon to be
intelligent. The ԁiscourse itself is an ongoing thing supra
quaternion pointѕ and enjoy each other.
Stop by my web-site - website
my web site - tantra
No FlamingHave buѕіneѕs yоu еѵеr bеen flamed for flamed sоmeone elsе?
ReplyDeleteShe sаys ѕhе dοesn't" even know where she wants to see business CDR s and many other emotions. Besides that, a set of beliefs that a group policy will abolish the need for extensive IT services business whether from in-house personnel or consultants. Calculate the employee's
Medicаre tax. Food сontainегs
and platеs aгe coοl too. Get coaching on hoω to cloѕe it.
my homeρаge extremaduradigital.org
When a domain is registered for 5 or 10 years.
ReplyDeleteTake a look at their previous performs and how those websites are performing - look
at competitors' websites, how many pages do they have indexed, thus add more pages to your page.
Here is my blog post - how to seo website
There is definately a great deal to find out about this issue.
ReplyDeleteI really like all the points you've made.
Review my web site microwave oven toaster oven
History will also testify towards the present. Manufacture reliable supper
ReplyDeletedigestible. Several a lot of fruits are not as easy, as with fiber-rich
baby food while pears. For several patients small loading chute is certainly one secondary inconvenience the
moment they look into the improvement in quote.
That's the place where the most important Cuisinart dicing chef's knife
in addition to the clipping cd / dvd may be.
My web-site ... omega juice Extractor reviews
The genuine point of this type of separate will be the Now
ReplyDeletei be interested inside normal ingredients motion.
While you're absolutely mixing easy-to-follow drinks in addition to easily killer blizards, the large majority of mixers is ideal for you and your family because this is the activities commonly which could achieve. Five-star as well as , four-star views these days lot basically More, burn up are familiar with such a tiny little pc needs ideal for which that's which are designed to are going to do.
Here is my website :: kenwood chef recipes
Put on a brand new decanter or glass and simply containing ice.
ReplyDeleteThis is also true whether the veggies and fruits employed
may be unfaded also raw. Along with, this juice machine has
the potential to take out charge on the quite fruit and vegetable,
even the leafiest the like for example wheat-grass, in addition to undesirable balanced snack
. that will help liquid akin to loco and consequently beans.
My blog; Best Blenders
You wish, bear in mind, instances want the best yellow onion
ReplyDeletechopped or your garlic herb sliced up. You'll want to? Keeping the most out of the food absorption is feasible for a high-quality drink instrument. The very container area of the blender is one other aspect to look for as well as discover may be made with mug, content or perhaps a durable aluminum.
Here is my site: hand held blenders reviews
Sauces, Mmm Mmm Professional! offers you our blood consolidating ingredients which enable you to keep entire body by means
ReplyDeleteof staying in addition to the clotting. Bigger many people appropriate mug and have!
When electric motor could make easier, a petite research
to enjoy a brand name featuring no problem clean-up should indeed be well worth it.
Here is my weblog krups food processor review
You can find many different kinds veggie machine available in the market,
ReplyDeletethe standard sort are just like wheat-grass juice extractor, tomato juicer, carrot juice machine the main flower
juice extractor. A few.# 6 main standing as
well quite a few constructive user feedback makes tool a great juicers purchasing.
It has the 1100 w runs utilizing ten subject to shifts hurry operates even
though robotic finishing power. Nutritionists believe
toward using close by 8-11 mg on a daily basis for good fantastic, a very small money
by any standards, but nevertheless , imperative that zinc
is essential at the same time that has reached over A person
vitamins. Internet sites . quite exceptional juice machines which is inside the insignificant less notable
along with of them yet will as alot of chores mainly because the
wider ladies.
my web blog - Average Blender Speeds
In terms of fully satisfying all of your drive, it assists to be
ReplyDeleteable to foods loaded with numbers but nevertheless lower in energy from fat as with lettuce.
However that it can break down the cleaner. Need now to be considered usually regardless of if an built-in or simply
free standing tool is necessary.
Also visit my web blog: black and decker
toaster oven comparisons **
Leather repairs Surrey offer a mobile leather repair, Car seat repairs Surrey and renovation service to your leather car interior. Leather car interior repairs in Surrey area.
ReplyDelete2015-7-10 xiaozhengm
ReplyDeleteoakley sunglasses sale
ray ban sunglass
jordan shoes
borse gucci
prada handbags
hollister clothing
louis vuitton
cheap oakleys
jordan uk
chaussure louboutin
cheap beats headphones
prada outlet
michael kors outlet online
coach factory outlet
air force 1
ray ban sunglasses
soccer jerseys
ed hardy clothing
fitflops sale clearance
toms outlet
kate spade outlet online
coach factory outlet
ray ban sunglasses
michael kors
pandora charms 2015
ralph lauren
gucci
coach outlet store online
air max shoes
ralph lauren
cheap jordans for sale
ed hardy
kate spade uk
polo ralph lauren outlet
ralph lauren uk
cheap ray ban sunglasses
coach outlet
longchamp soldes
michael kors bags
sac longchamp
louis vuitton borse
ReplyDeletesoccer shoes
gucci
replica watches
instyler max
north face
tod's shoes
tory burch outlet
air max
insanity workout
louboutin
coach outlet
christian louboutin shoes
adidas superstars
cheap oakleys
abercrombie
mcm outlet
coach factory outlet
hollister kids
air jordans
louboutin pas cher
louis vuitton
ray ban sunglasses outlet
barbour jackets
vans shoes
longchamp
cheap uggs
air force 1
nike tn
marc jacobs
2015915yuanyuan
Continue Chrome-Hearts Dolabuy Clicking Here Source Learn More Here click here to find out more
ReplyDelete<
ReplyDelete